


It’s 2017 and when it comes to weddings, the website is essentially the new invitation. It not only dispenses pertinent information about your big day, but it sets the tone for the event your guests will be attending. And like invitations (and cakes and flowers and everything else), there is an overwhelming amount of options out there.

Having just gone through this whole process last year, I am gladly here to bestow all that I learned and assist in your wedding planning process! First, you can forget about all of the options, because there is one best choice out there when it comes to wedding websites: it’s Squarespace, and it’s my personal favorite (and the one my husband and I used). Squarespace has the sleekest design options out there (but more on that later), it’s extremely user-friendly, and it allows for complete customization. Plus it doesn’t look like it’s branded through an affiliate company like many of the others do.
From start to finish, building your wedding website could take anywhere from an hour to several hours depending how much detail you want to put out there and how many pages you want to create. But overall, once you master the general flow of uploading photos and editing text, it moves quite quickly! So if you’re newly engaged and ready to get started, follow along…
Ready to share your vision or business with the world? Start your free Squarespace trial today (no credit card required) and use code ‘EVERYGIRL’ for 10% off when you’re ready to publish your website.
Step 1. Gather all of the wedding information.
It’s important to note that before you can start building your wedding website, you should have most of the wedding details sorted out. Once you share the URL with guests, they should be able to find all of the information they need about your big day, from addresses (including parking details) and dates/times, to attire suggestions and possible menu options, etc.
Similarly, you should have pulled together any and all photos you’d want to use on the site. A lot of people use their professional engagement photos to create a more professional look on the site. But it’s not a problem if you didn’t do an engagement shoot! We didn’t either. We just used favorite photos of us as a couple that had been taken over the years. You can also include photos of the venue, or if it’s a destination wedding, photos of suggested places to go and pictures of the destination itself.
Step 2. Start creating your wedding website.


Setting up your site is as easy as 1, 2, 3. First, go to https://www.squarespace.com/. If you don’t already have an account with the site, click GET STARTED and sign up. Don’t forget to use the coupon code “EVERYGIRL2” for 10% off your first purchase!
Once you’re logged in, or if you do already have an account, you can click CREATE NEW SITE. Yes. It’s as simple as that. Moving right along…
Step 3. Choose a Wedding Template
After selecting CREATE NEW SITE, you’ll be given the option to choose a design from among Squarespace’s many templates. They’ve already filtered out the templates that work best for weddings for you… however, this is arguably the most difficult part of the process because all of the designs are so. darn. beautiful.


You can click on any of them to preview how they look both on a computer browser and on mobile. Keep in mind all of the photos and text for each design are completely customizable, but Squarespace does an amazing job of showcasing how each design looks with beautiful placeholder imagery. You can also view samples of live websites that use the template — this feature really allows you to see all of the customization options available.
For this tutorial, I’m going to use the Alex template because personally, I love it and it’s the one I used for my own wedding site.
Once you decide on a design, simply select START WITH [TEMPLATE NAME].
Step 4. Name Your Site
After selecting a template, you’ll be asked to choose your site name! Most people just do the couple’s name, but another fun idea is to make it your wedding hashtag! If you purchased a custom URL, I recommend making this the same as the URL. Haven’t purchased a URL yet or don’t know where to start when looking for one? Don’t worry, you can check availability and buy one directly through Squarespace here: https://www.squarespace.com/domain-name-search/.
Example names for your wedding website:
The first names of the couple… Ed + Elizabeth’s Wedding, Margot + Caroline Tie the Knot, or simply Jack & Lauren.
If you have a wedding hashtag, you could use that… #MeetTheBrowns, #EdAndLizSayIDo

Once you type in your site name and hit DONE (which is always editable, so don’t worry!), you’re ready to go! Next, you’ll be taken to the back end of your new wedding website. Time to customize!
Step 5. Customize the Site
As you can see, Squarespace already has a ton of placeholder text and images which helps guide what could or should go where. If you want to make this is easy as possible, simply start switching out Squarespace’s images and text with your own wedding information!
To change images:
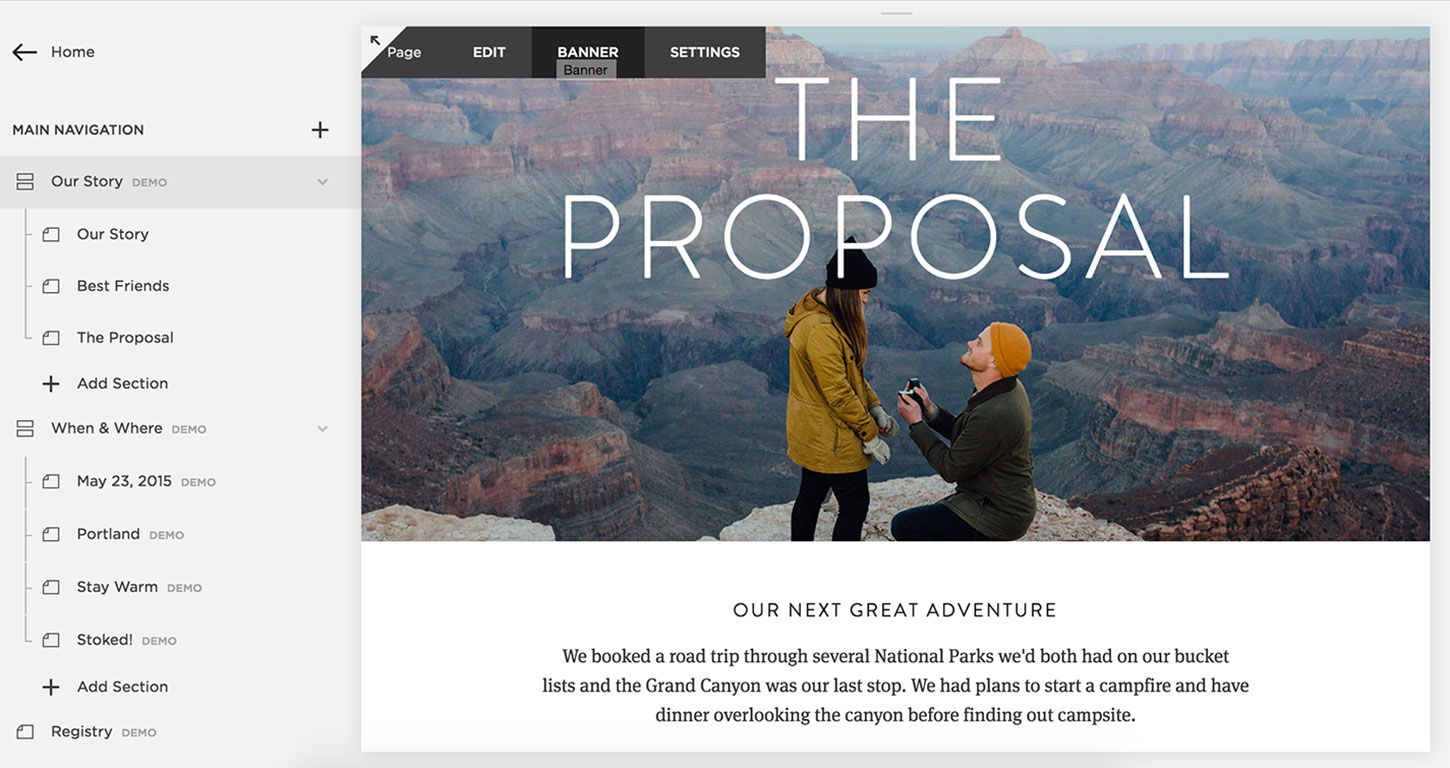
1. Hover over an image and a menu will pop up in the top left corner, click on BANNER.
2. Then a message will pop up alerting you that you’re about to change their placeholder images… it will read: Modifying Demo Content. Select CREATE.
3. At that point, a new box will open up with the current placeholder image in it. Select REMOVE to discard the current image, then UPLOAD your own file. You want to make sure the image is large enough to fill the screen (at least 800px wide) but not a high res image (more than 1MB) as that will make your site move much slower. Once your image is uploaded, make sure you hit SAVE before closing the image uploader box. You should now see YOUR picture on the site.
Repeat this process with all other images on the site.

To change text:
1. Hover over a text box and click EDIT. You can then change the formatting, header, text, add in hyperlinks, and make the site truly yours! Always be sure to hit SAVE before moving on.

Again — easy!
6. Removing Pages and Adding New Sections
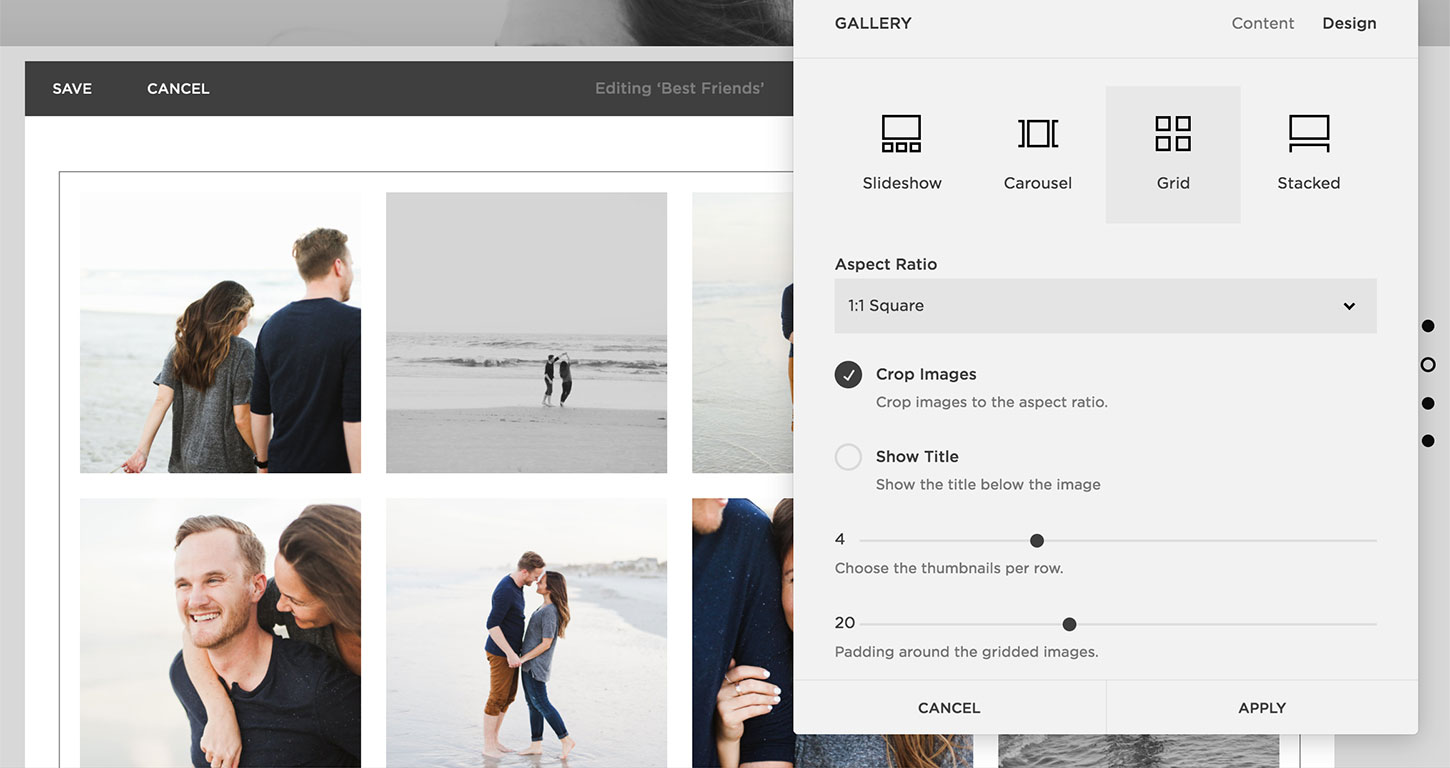
There are two ways to customize the site by adding or deleting sections (text, images, image grids, etc.).
Option 1: Left Hand Menu
To Delete a section: simply hover over a section in the left-hand menu and a TRASH CAN icon will appear on the far left. Click that.
To Add a section: in the left-hand menu, select + ADD SECTION, CONTENT, then a menu of layout options will appear that you can choose from depending on how much information you want to add.

Option 2: Manage Sections
Another way to add or delete sections on a page is by hovering over the main content area. You’ll see a tab pop up that says MANAGE SECTIONS in the top right. Clicking on this will take you to a new page where you can easily DELETE or ADD new content by clicking on the RED MINUS SIGN next to a section or selecting the PLUS SIGN at the bottom of the page.


If you’re adding new content, simply select the layout you need — will your new feature have only a photo? Only text? A photo and text? Multiple photos? All of those options are presented before you, all you have to do is select the one you want and start uploading and writing in your content.
7. Editing and Adding More Pages
Once you’ve finalized the homepage, you can continue on with the other pages on the site.
Note: there is a difference between SECTIONS and PAGES. Each PAGE — like the HOMEPAGE for example — can have one or as many sections as you’d like. The separate PAGES are what appear in the top navigation of the site. In this example, the PAGES are OUR STORY, WHEN & WHERE, REGISTRY, and RSVP.


When it comes to PAGES and SECTIONS, the options are endless to make this a site that is truly unique to you and your significant other. Keep in mind you don’t want 10 different pages in the Navigation at the top… so here are a few recommendations that make the site helpful and interesting for your guests:
- Share Your Story
- this can include back story about the couple and/or engagement, personal photos, a timeline of key events in your relationship, etc.
- Event Details and Itinerary
- This should include a calendar of events for the wedding weekend, addresses, appropriate attire, what to expect with weather, hotel blocks guests can book, etc.
- If it’s a destination wedding, you can add in your recommendations for where to eat and go on the trip.
- Bridal Party
- This is a great spot to highlight those standing up in your wedding! You can include photos and brief bios to each of the groomsmen and bridesmaids.
- Registry
- Add hyperlinks to the various places you’ve registered. Squarespace is also integrated with the online registry site Zola, so you can easily add your online registry to your wedding website.
- Map
- Highlighting the destination and specific locations for wedding events.
- RSVP
- Be sure to check out the customizable RSVP block, in which guests can enter their plus one, dinner preferences, and more.
- Contact
- How can guests reach you with questions? Include a contact name, number, or email.
As I’ve said, Squarespace has already done a lot of the legwork for you, but if you want something different than the template, it’s very easy to remove a page (say for example if you are sending out RSVP cards with the invitation and don’t want guests RSVPing on the site). Simply delete it in the left-hand menu, OR edit it to your own content — say, a page with photos and names of your wedding party.
Step 8: Other Customizable Details
CHANGE THE SITE NAME OR ADD A LOGO
![]()
Click HOME in the top left of the menu, which will take you back to the main control panel.
To change the site name or add a logo to the top left corner, click on DESIGN > LOGO & TITLE, and you can either just change the name or upload a logo! If you don’t have a logo yet, you can create one simply and easily within Squarespace here: https://logo.squarespace.com/.
To get back to editing your site, click back to the navigation and select PAGES.
CHANGE THE FOOTER

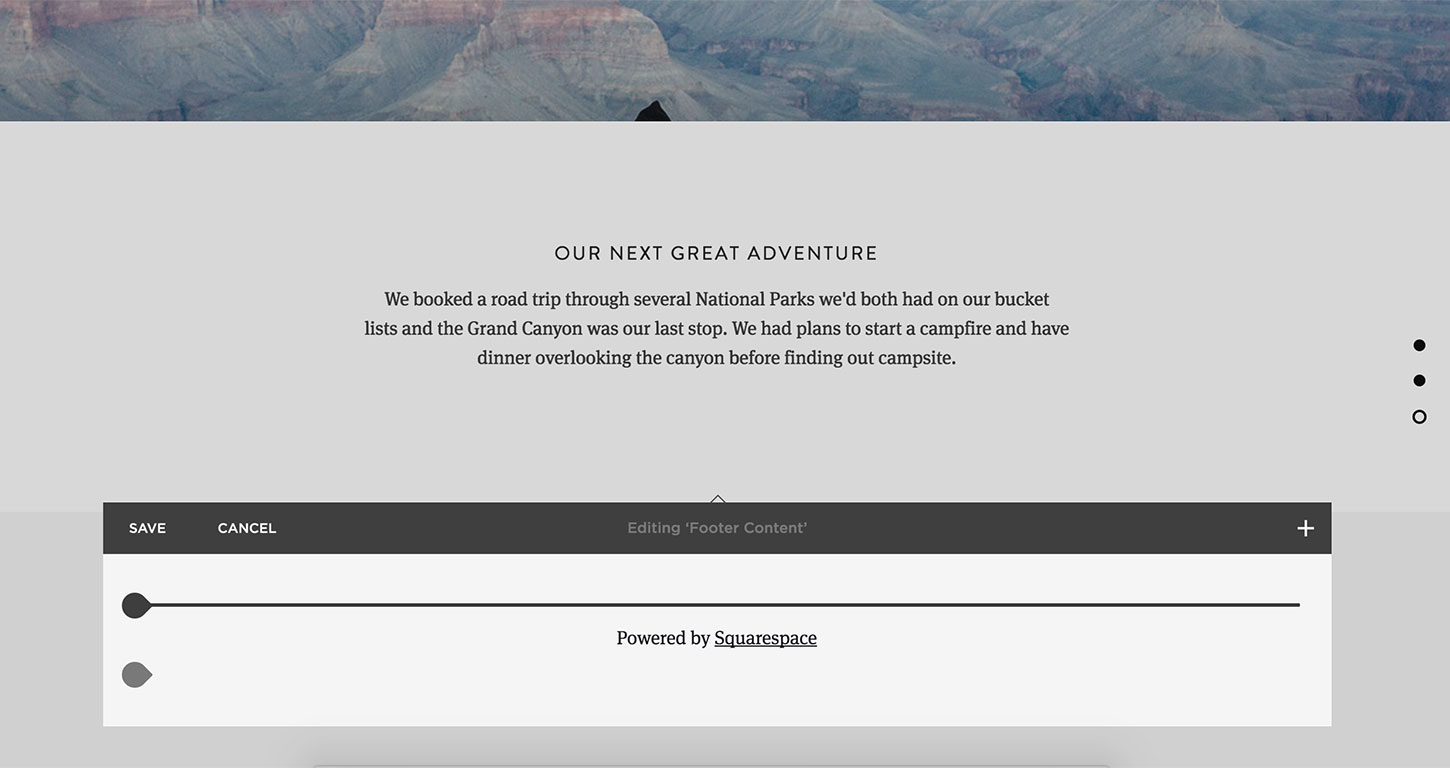

Scroll down to where the footer is, REMOVE the current block, then ADD new content. You can add a photo, text, a link, a favorite quote, a hashtag… anything you want!
CHANGE STYLE OF FONTS, COLORS, ETC.


To change the size, color, fonts of any of the text, you have to go to the HOME menu on the left-hand side, select DESIGN, select STYLE EDITOR and there you’ll see options to edit. You can see the changes in the site preview on the right as you make them, which is helpful. Make sure you love it before hitting SAVE and returning back to the PAGES menu to edit content.
If you’re having trouble with any of the steps above, or if you need help customizing anything on your site, you can utilize this easy to follow and comprehensive guide Squarespace has put together or contact their 24/7 Support Team, who will respond to you within the hour.
–––––––––––––––––––––
As I said, this entire process can take as little or as much time as you want, depending on how detailed and customized you want the site to be. Me? I went a little out there… we had a very small destination wedding in northern California meaning we had separate events across three days, so I added a lengthy itinerary outlining where, when, and what to wear to each event… from our casual welcome party on a bar patio to wine tasting and where transportation would be picking people up… no detail was forgotten. I also added a page with recommendations on restaurants, activities, hotels, and wineries in the area so our guests could knowledgeably explore in their free time.
Hosting a more simple event? Then yes, you can definitely keep the site simple with a single page or two.
Whatever you end up with, the site should reflect you as a couple and your wedding day. And heck — congratulations! What an exciting time! Ready to start building your site? Remember to use the coupon code “EVERYGIRL2” for 10% off your first Squarespace purchase. Have fun!
Ready to share your vision or business with the world? Start your free Squarespace trial today (no credit card required) and use code ‘EVERYGIRL’ for 10% off when you’re ready to publish your website.
![]()
This post was in partnership with Squarespace, but all of the opinions within are those of The Everygirl editorial board.
